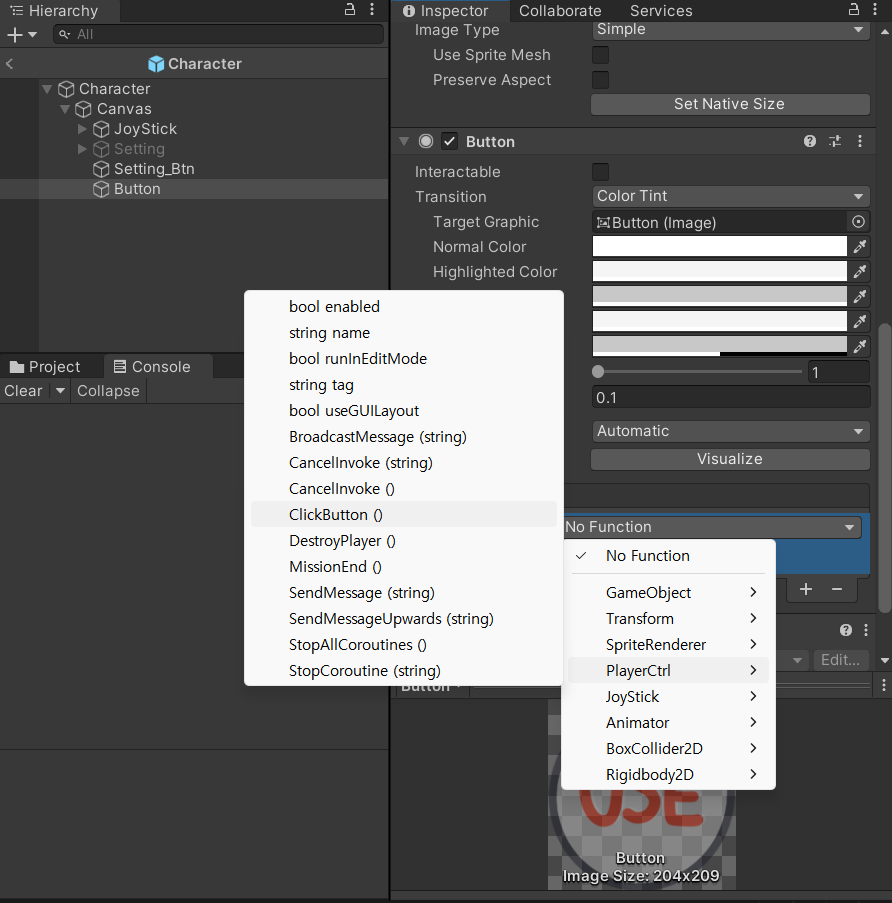
미션을 눌렀을 때 나오는 애니메이션은 캐릭터 안에 버튼을 만들 것이다.

버튼은 아래와 같은 설정으로 만들어준다.

나중에 코드에서 on, off 할 것이다.
using System.Collections;
using System.Collections.Generic;
using UnityEngine;
using UnityEngine.UI;
using UnityEngine.EventSystems; //UI를 선택한 것인지 그냥 움직인 것인지 확인


public class PlayerCtrl : MonoBehaviour
{
    public GameObject joyStick, mainView, missionView;
    public Button btn;
    Animator anim;

    public float speed;
    public Settings settings_script;

    public bool isCantMove; // 이건 settings에서 바꾼다.

    private void Start()
    {
        anim = GetComponent<Animator>();
        Camera.main.transform.parent = transform; //캐릭터 이탈 방지
        Camera.main.transform.localPosition = new Vector3(0, 0, -10);
    }
    private void Update()
    {
        if (isCantMove)
        {
            joyStick.SetActive(false);// 못움직이는 상황에서는 조이스틱도 보이지 않는다.
        }
        else
        {
            Move();
        }
    }

    // 캐릭터 움직임 관리
    void Move()
    {
        if (settings_script.isJoyStick)
        {
            joyStick.SetActive(true);
        }
        else
        {
            joyStick.SetActive(false);

            // 상하좌우를 터치하여 움직이기

            //클릭했는지 판단.
            if (Input.GetMouseButton(0))
            {            // 좌클릭 누르고 있는 중 컴퓨터 모바일 다 해준다.
                if (!EventSystem.current.IsPointerOverGameObject())
                {//클릭한 것이 UI가 아니라면
                    Vector3 dir = (Input.mousePosition - new Vector3(Screen.width * 0.5f, Screen.height * 0.5f)).normalized; // 화면 정중앙을 빼서 얼마나 이동하는지를 노말 백터화 한다.

                    transform.position += dir * speed * Time.deltaTime;

                    anim.SetBool("isWalk", true);// 어떤 불값을 어떻게

                    //왼쪽으로 이동
                    if (dir.x < 0)
                    {
                        transform.localScale = new Vector3(-1, 1, 1);
                    }
                    else
                    {
                        //오른쪽으로 이동
                        transform.localScale = new Vector3(1, 1, 1);

                    }
                }


            }
            else
            { // 이동하지 않을경우
                anim.SetBool("isWalk", false);// 어떤 불값을 어떻게

            }
        }

    }

    // 캐릭터 삭제
    public void DestroyPlayer()
    {
        Camera.main.transform.parent = null;
        Destroy(gameObject);
    }

    //트리거와 접촉한 경우
    private void OnTriggerEnter2D(Collider2D collision)
    {
        if(collision.tag == "Mission")
        {
            btn.interactable = true;
        }
    }

    //트리거와 떨어진경우
    private void OnTriggerExit2D(Collider2D collision)
    {
        if (collision.tag == "Mission")
        {
            btn.interactable = false;
        }
    }

}
코드는 위와 같다. 트리거와 접촉했을 때 버튼이 가능하도록 구현했다.

돌려보면 잘 작동한다.
항상 메인 화면을 켜놓고 작동 시키는거 잊지 말기!

이름은 BackGround이다.
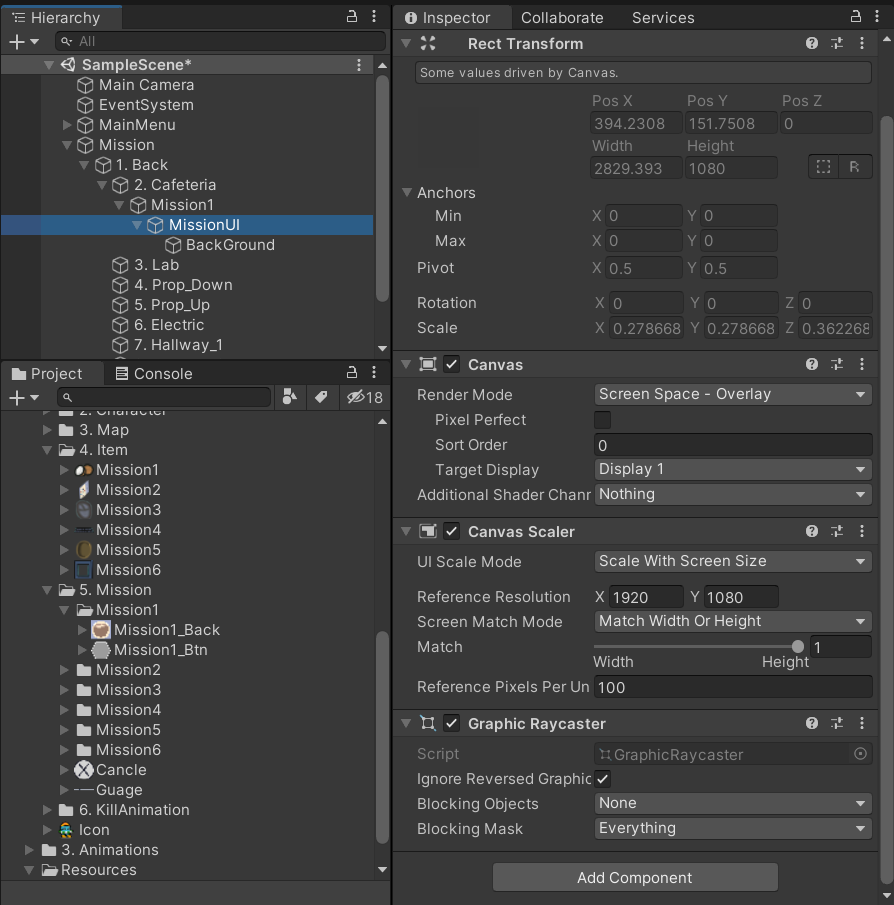
해상도도 바꿔준다.

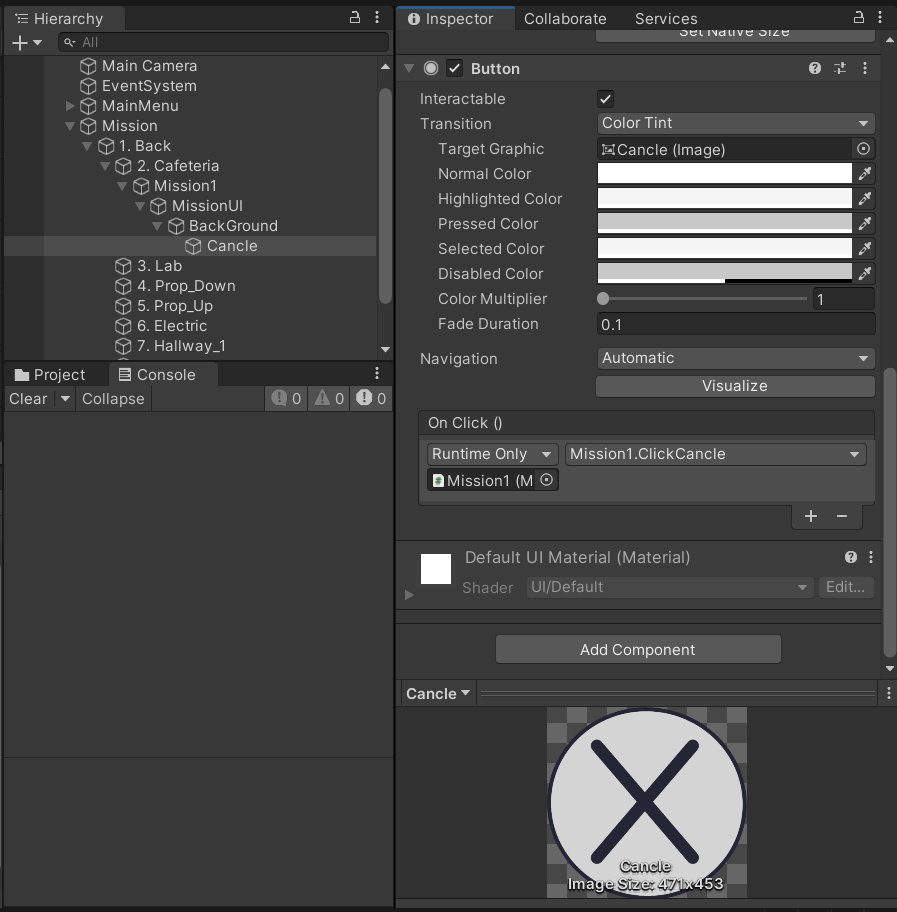
그리고 BaclGround안에 버튼을 또 만들어주고 이름은 Cancle이다.

이제 애니메이션을 만들어 보겠다.

올라와서 가만히 멈춰있는 애니메이션이다.

처음부터 끝까지 Position.y가 0이되어야 한다.

시작의 Possion.y는 0이지만 마지막은 -1000이 되도록 해준다.
플레이해보면 Cancle 버튼과 BackGround가 같이 떨어지는 것을 볼 수 있다.
이젠 내려가서 저 버튼과 배경이 멈추는 것을 만들어야 한다.

시작과 끝이 -1000이다.
마지막으로 올라가는 애니메이션까지 만들어준다.

그 후 위 사진과 같이 우측에 Loap Time를 down과 Up 하는 행동이 있는 두개만 꺼준다.

우린 내려가있는게 디폴트이므로 IDLE DOWN을 디폴트로 설정해 놓는다.

밑에 있다가 올라가는 애니메이션, 올라가서 멈춰있다가 내려가는 애니메이션 순서대로 만들어준다.

그리고 Mission_Idle_Down과 Mission_Up를 이어주는 화살표를 클릭하여 설정을 위 사진 오른쪽과 같이 해준다.

이 후 다른 것에선 별다른 수정없이 새로운 스크립트 Mission1을 만들어 준다.
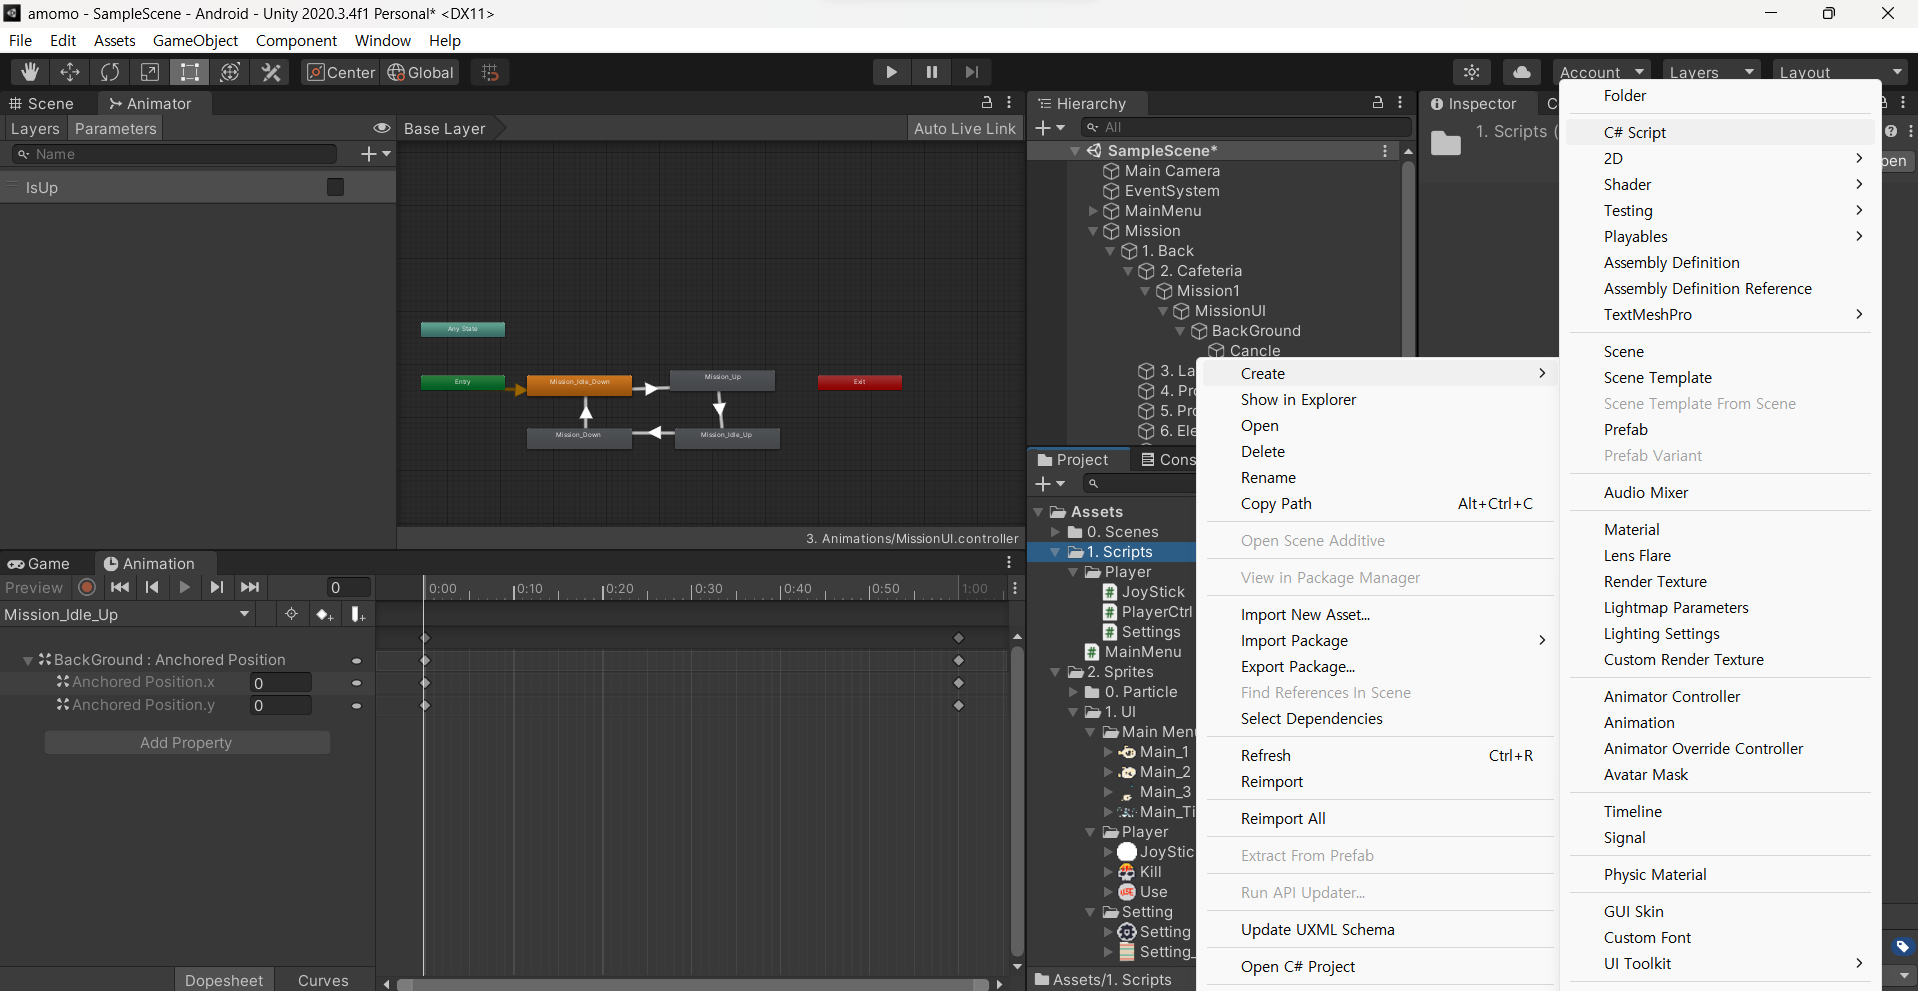
Mission1 스크립트는 hierachy의 Mission1에 집어넣는다.
using System.Collections;
using System.Collections.Generic;
using UnityEngine;

public class Mission1 : MonoBehaviour
{
    Animator anim;

    // Start is called before the first frame update
    void Start()
    {
        //getcomponent를 그냥 쓰면 안된다. 여기서 애니메이션은 하위 파일에 있다.
        anim = GetComponentInChildren<Animator>();

    }

    //미션 시작
    public void MissionStart()
    {
        anim.SetBool("IsUp", true);
    }

    //x버튼 누르면 호출
    public void ClickCancle()
    {
        anim.SetBool("IsUp", false);
    }
}
코드의 구현은 간단하다.
아래의 코드는 PlayerCtrl에서 미션 스타트 함수를 실행하도록 구현
using System.Collections;
using System.Collections.Generic;
using UnityEngine;
using UnityEngine.UI;
using UnityEngine.EventSystems; //UI를 선택한 것인지 그냥 움직인 것인지 확인


public class PlayerCtrl : MonoBehaviour
{
    public GameObject joyStick, mainView, missionView;
    public Button btn;
    Animator anim;
    GameObject coll;

    public float speed;
    public Settings settings_script;

    public bool isCantMove; // 이건 settings에서 바꾼다.

    private void Start()
    {
        anim = GetComponent<Animator>();
        Camera.main.transform.parent = transform; //캐릭터 이탈 방지
        Camera.main.transform.localPosition = new Vector3(0, 0, -10);
    }
    private void Update()
    {
        if (isCantMove)
        {
            joyStick.SetActive(false);// 못움직이는 상황에서는 조이스틱도 보이지 않는다.
        }
        else
        {
            Move();
        }
    }

    // 캐릭터 움직임 관리
    void Move()
    {
        if (settings_script.isJoyStick)
        {
            joyStick.SetActive(true);
        }
        else
        {
            joyStick.SetActive(false);

            // 상하좌우를 터치하여 움직이기

            //클릭했는지 판단.
            if (Input.GetMouseButton(0))
            {            // 좌클릭 누르고 있는 중 컴퓨터 모바일 다 해준다.
                if (!EventSystem.current.IsPointerOverGameObject())
                {//클릭한 것이 UI가 아니라면
                    Vector3 dir = (Input.mousePosition - new Vector3(Screen.width * 0.5f, Screen.height * 0.5f)).normalized; // 화면 정중앙을 빼서 얼마나 이동하는지를 노말 백터화 한다.

                    transform.position += dir * speed * Time.deltaTime;

                    anim.SetBool("isWalk", true);// 어떤 불값을 어떻게

                    //왼쪽으로 이동
                    if (dir.x < 0)
                    {
                        transform.localScale = new Vector3(-1, 1, 1);
                    }
                    else
                    {
                        //오른쪽으로 이동
                        transform.localScale = new Vector3(1, 1, 1);

                    }
                }


            }
            else
            { // 이동하지 않을경우
                anim.SetBool("isWalk", false);// 어떤 불값을 어떻게

            }
        }

    }

    // 캐릭터 삭제
    public void DestroyPlayer()
    {
        Camera.main.transform.parent = null;
        Destroy(gameObject);
    }

    //트리거와 접촉한 경우
    private void OnTriggerEnter2D(Collider2D collision)
    {
        if(collision.tag == "Mission")
        {
            coll = collision.gameObject;
            btn.interactable = true;
        }
    }

    //트리거와 떨어진경우
    private void OnTriggerExit2D(Collider2D collision)
    {
        if (collision.tag == "Mission")
        {
            coll = null;

            btn.interactable = false;
        }
    }

    //버튼 누르면 호출
    public void ClickButton()
    {
        //미션 스타트를 호출
        // 미션 스타트 스크립트를 받아와야 하는데 간단하게 호출 가능
        coll.SendMessage("MissionStart");
        isCantMove = true;
        btn.interactable = false;


    }

    //미션 종료하면 호출
    // mission1파일에서 호출
    public void MissionEnd()
    {
        isCantMove = false;
    }
}
이제 마지막 함수를 호출하도록 Mission1스크립트로 다시 간다.
using System.Collections;
using System.Collections.Generic;
using UnityEngine;

public class Mission1 : MonoBehaviour
{
    Animator anim;
    PlayerCtrl playerCtrl_script;

    // Start is called before the first frame update
    void Start()
    {
        //getcomponent를 그냥 쓰면 안된다. 여기서 애니메이션은 하위 파일에 있다.
        anim = GetComponentInChildren<Animator>();

    }

    //미션 시작
    public void MissionStart()
    {
        anim.SetBool("IsUp", true);
        playerCtrl_script = FindObjectOfType<PlayerCtrl>();
    }

    //x버튼 누르면 호출
    public void ClickCancle()
    {
        anim.SetBool("IsUp", false);
        playerCtrl_script.MissionEnd();
    }
}
다 하나하나 치는거라 오류가 너무 무섭다.
실행해보자!
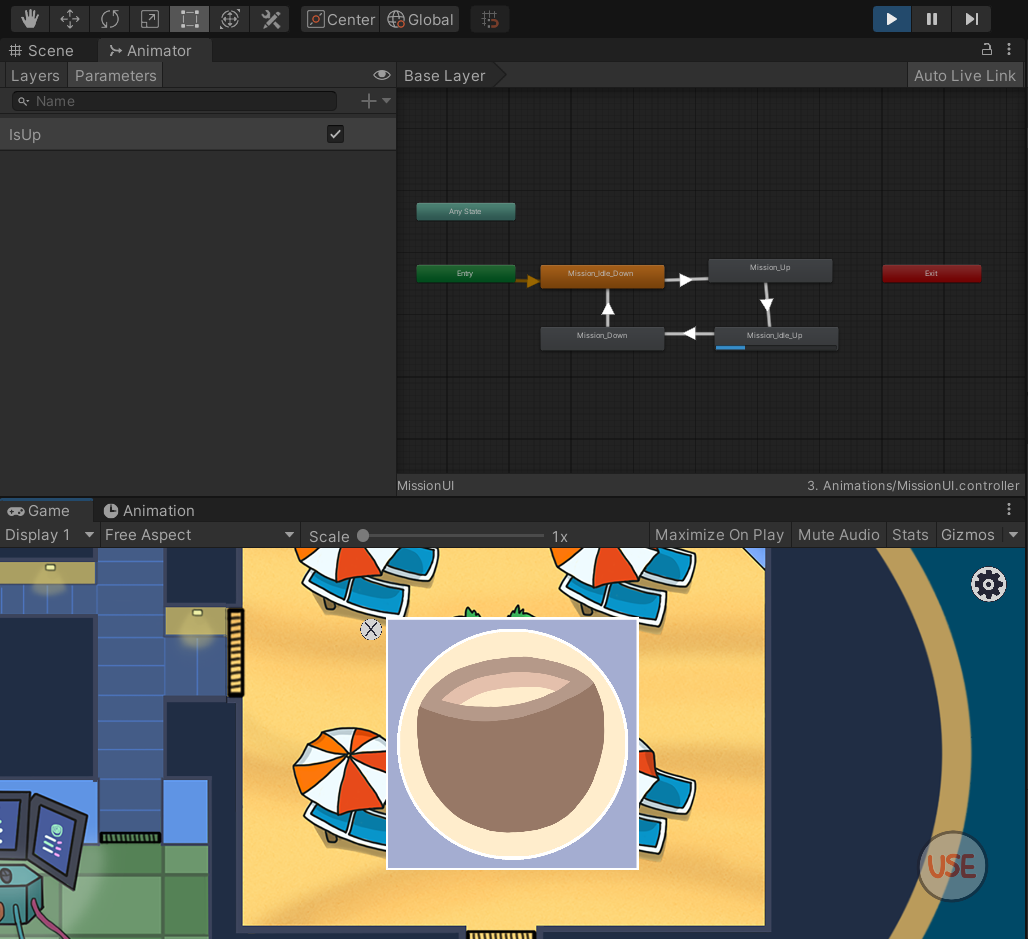
애니메이션을 확인했다!
'개발 > 게임 교육' 카테고리의 다른 글
| [Unity] 게임 교육 14 - 미션 2 (0) | 2024.01.02 |
|---|---|
| [Unity] 게임 교육 13 - 첫 번째 미션 만들기 (0) | 2024.01.02 |
| 게임 교육 11 - 미션 준비 (1) | 2023.12.29 |
| 게임 교육 10 - 설정 화면 (0) | 2023.12.29 |
| 게임 교육 9 - 오류 대처법 (0) | 2023.12.29 |